最近项目需要用到QtwebEngine 加载自建网页,整理手顺教程如下:
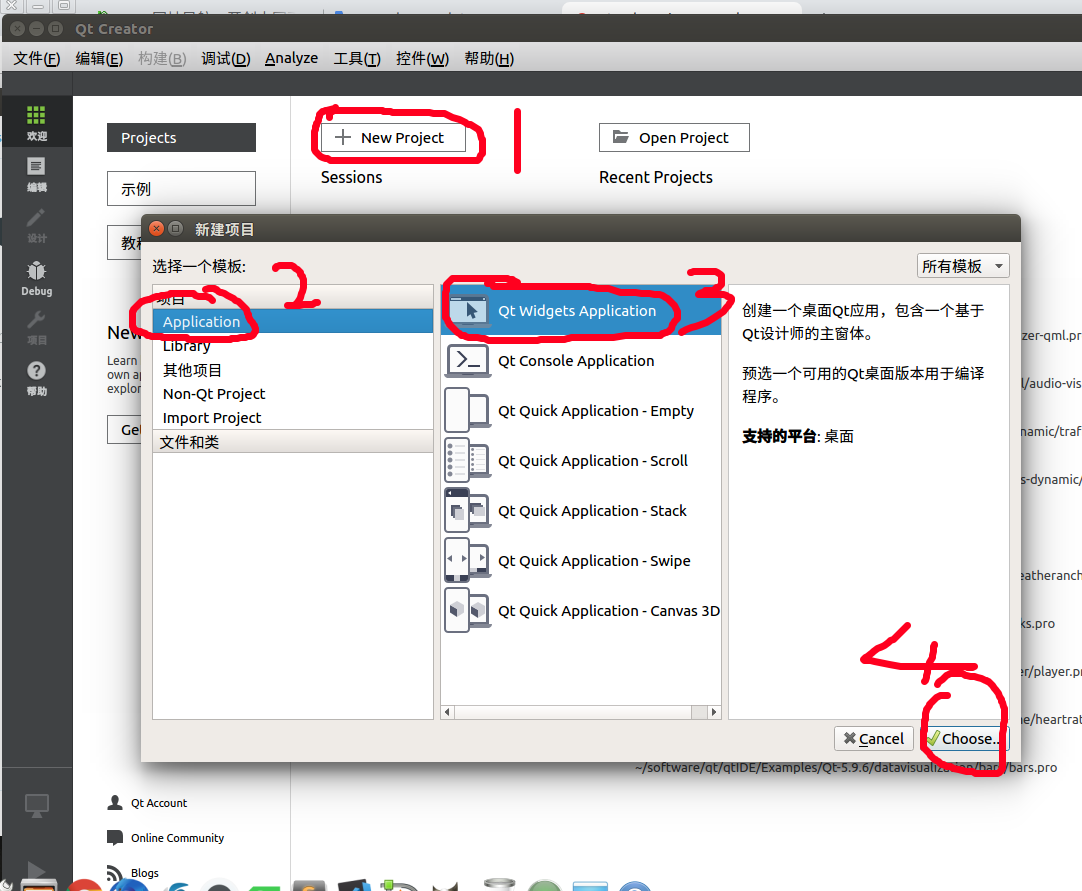
1、“new project” -> “Application” -> “Qt Widgets Application” ->“Choose”
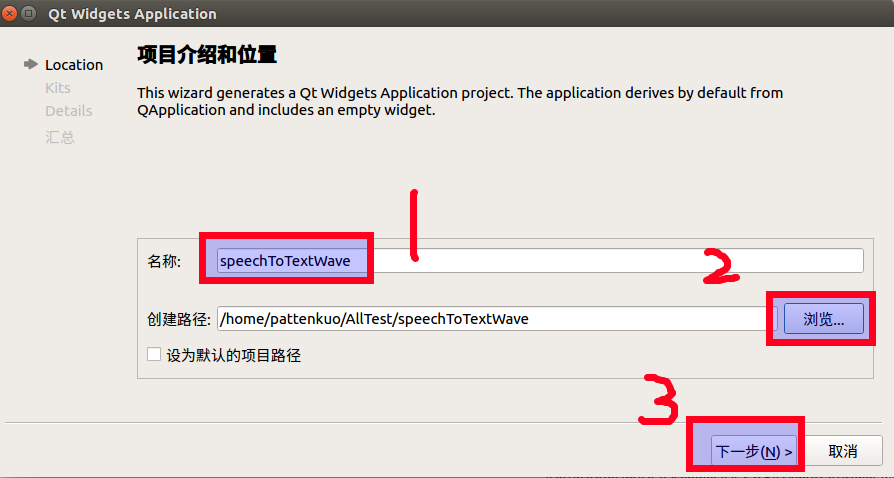
2、输入项目名称 -> “浏览…"(选择项目存储路径,尽量不包含中文)-> “下一步”
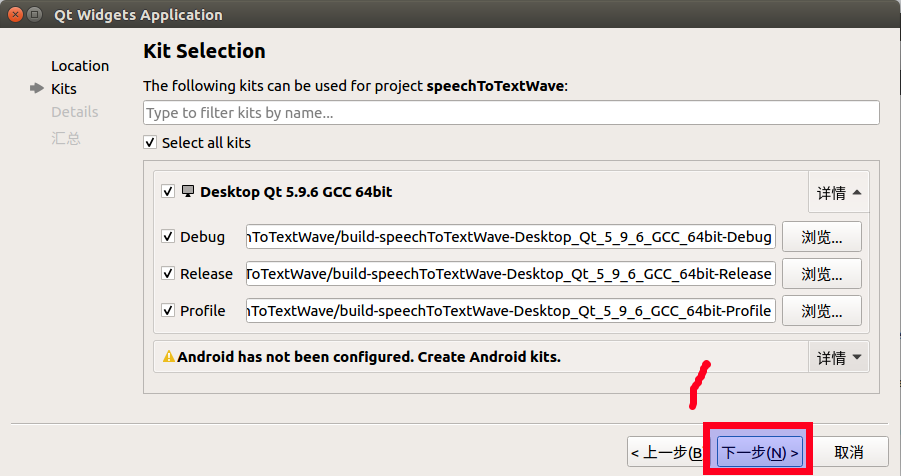
3、“下一步”(Debug\Release\Profile的路径默认即可,区别自己搜索)
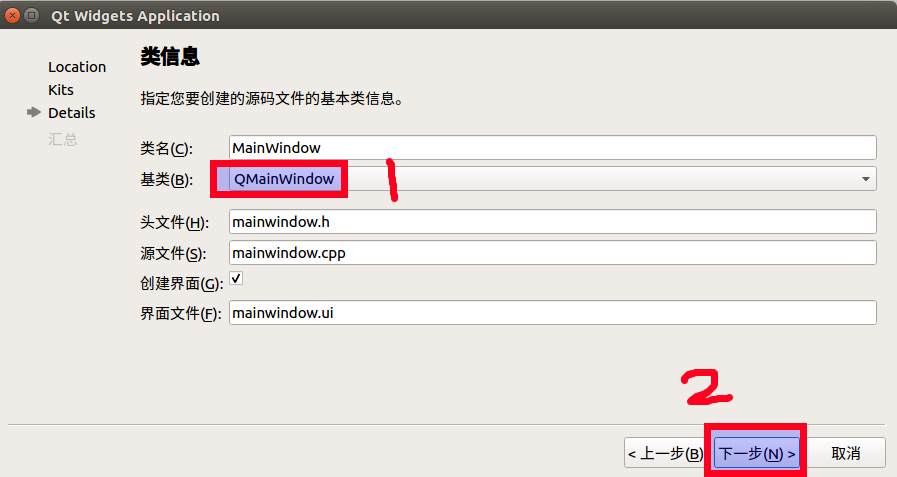
4、类信息默认即可,基类选择为QMainWindow,单击"下一步"
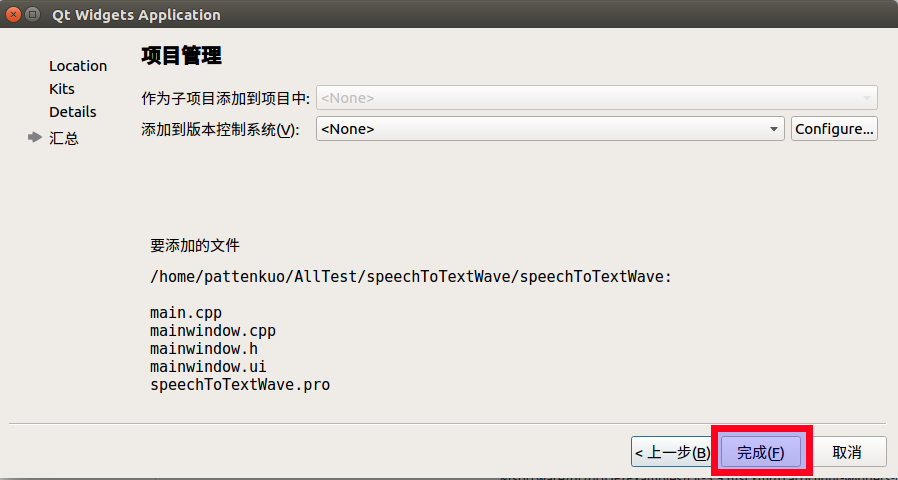
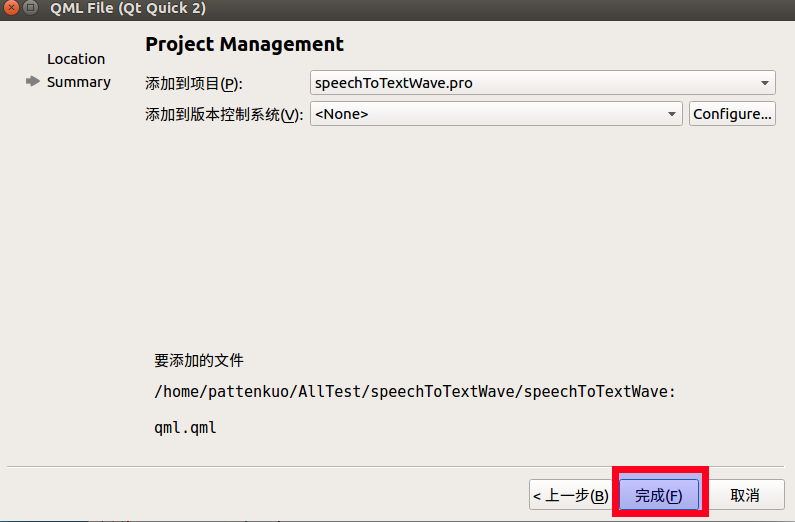
5、项目管理,单击"完成"即可(如果采用了版本控制系统,添加即可,这里演示不添加)
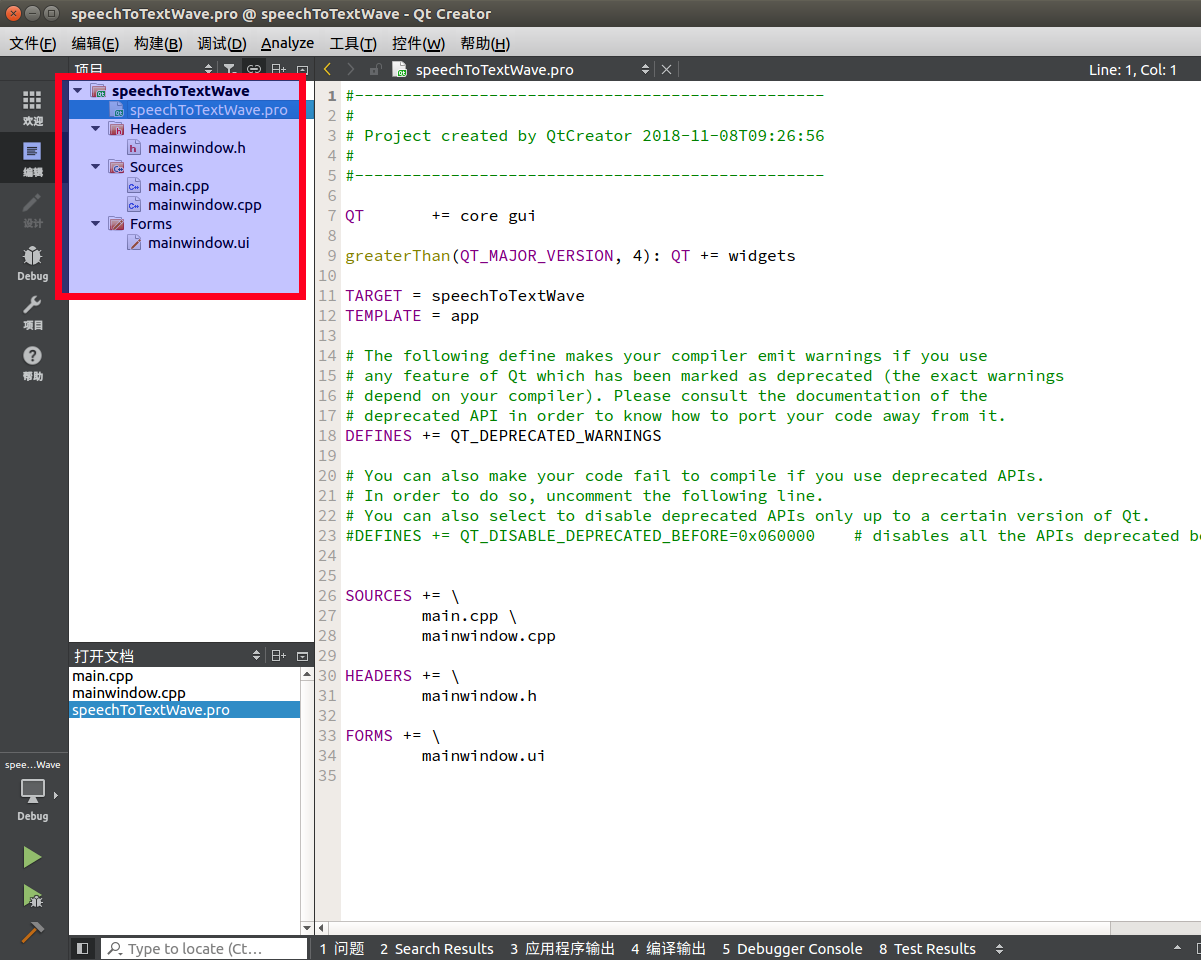
6、默认生成目录如图所示:
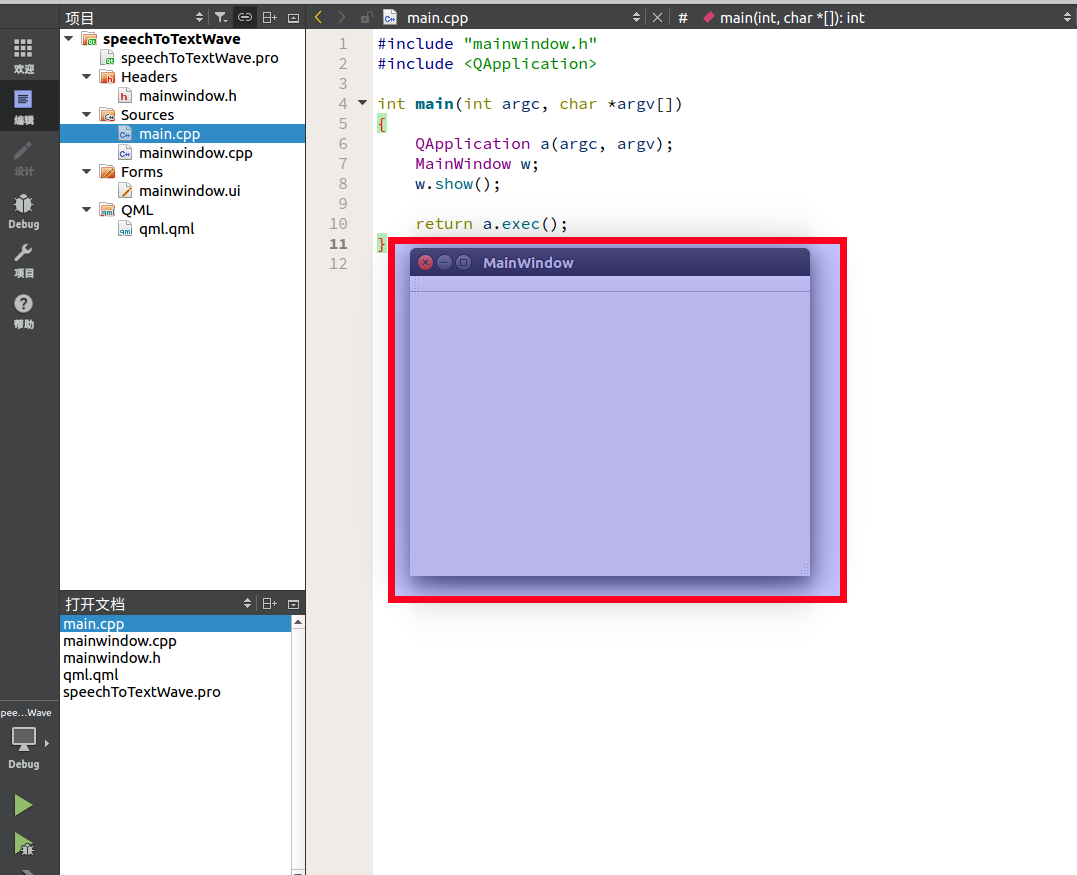
7、 ”Ctrl + R“执行一下,显示一个空白的窗口
speechToTextWave.pro "文件,添加一句”QT += webenginewidgets“如下:1 2 3 4 5 6 7 8 9 10 11 12 13 14 15 16 17 18 19 20 21 22 23 24 25 26 27 28 29 30 31 32 33 34 35 36 37 #------------------------------------------------- # # Project created by QtCreator 2018-11-08T09:26:56 # #------------------------------------------------- QT += core gui QT += webenginewidgets //添加此行 greaterThan(QT_MAJOR_VERSION, 4): QT += widgets TARGET = speechToTextWave TEMPLATE = app # The following define makes your compiler emit warnings if you use # any feature of Qt which has been marked as deprecated (the exact warnings # depend on your compiler). Please consult the documentation of the # deprecated API in order to know how to port your code away from it. DEFINES += QT_DEPRECATED_WARNINGS # You can also make your code fail to compile if you use deprecated APIs. # In order to do so, uncomment the following line. # You can also select to disable deprecated APIs only up to a certain version of Qt. #DEFINES += QT_DISABLE_DEPRECATED_BEFORE=0x060000 # disables all the APIs deprecated before Qt 6.0.0 SOURCES += \ main.cpp \ mainwindow.cpp HEADERS += \ mainwindow.h FORMS += \ mainwindow.ui
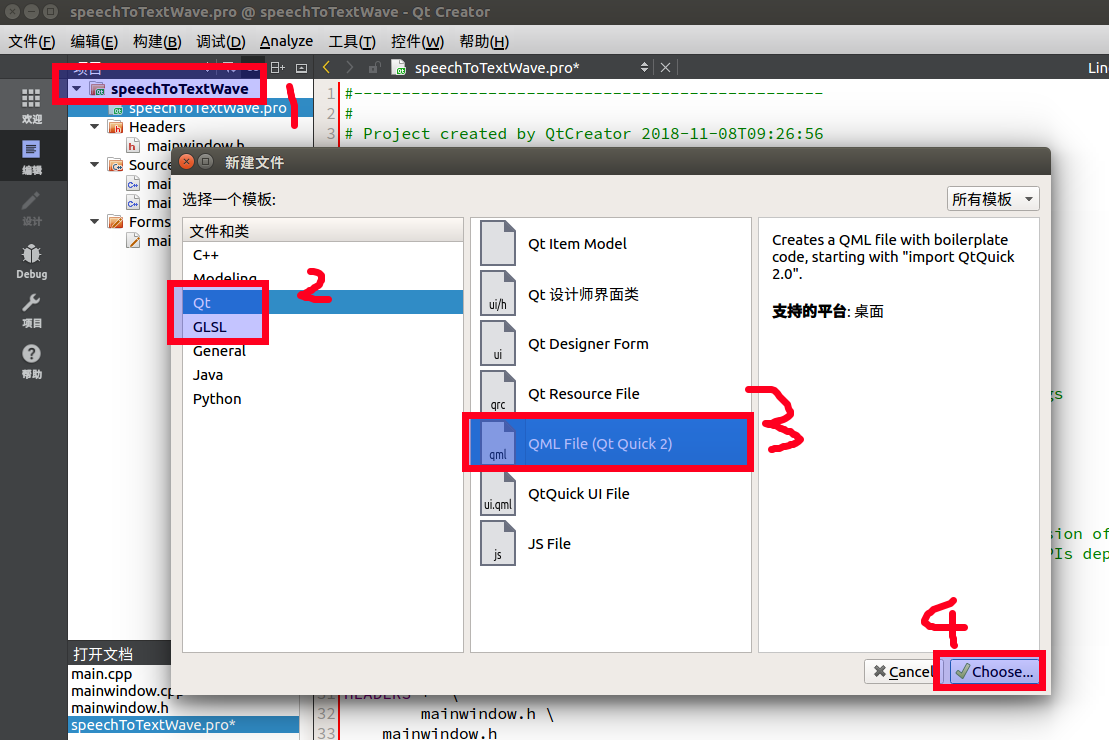
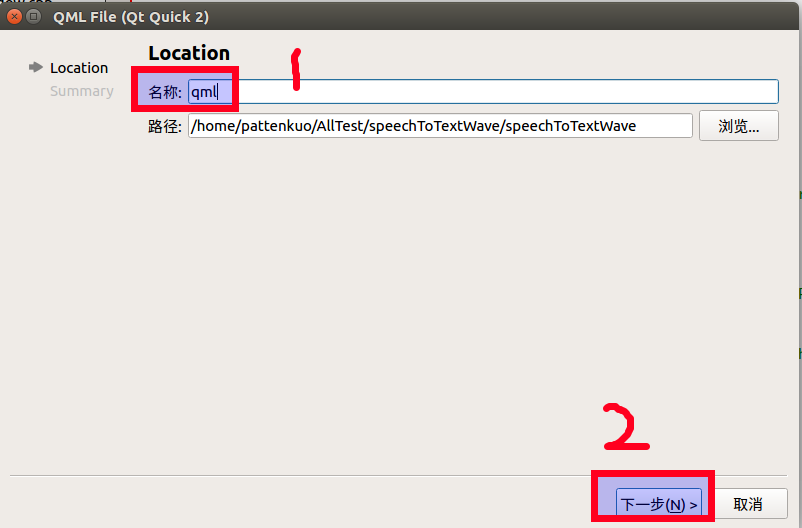
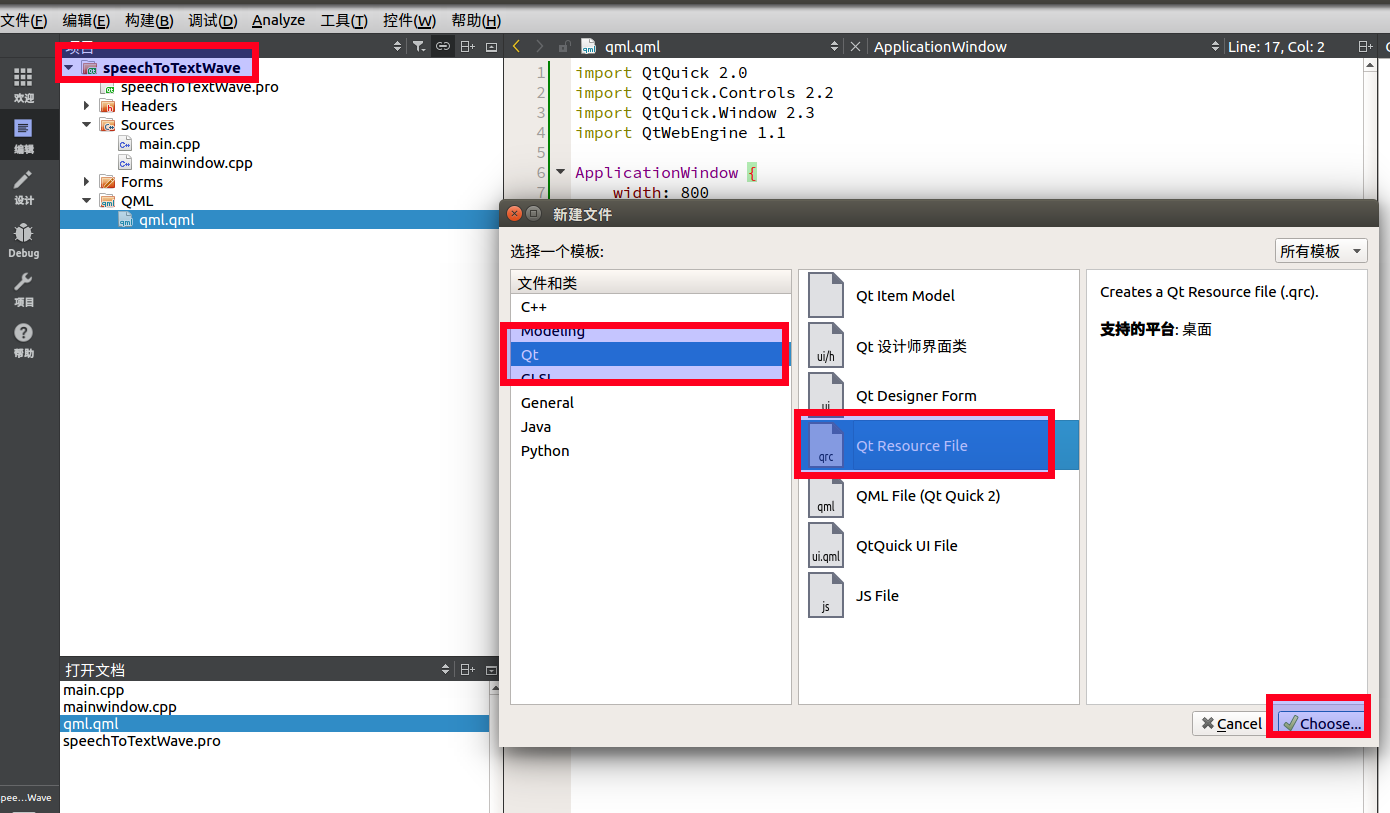
1、添加添加qml文件
填写文件名 -> “下一步” -> “完成” 即可
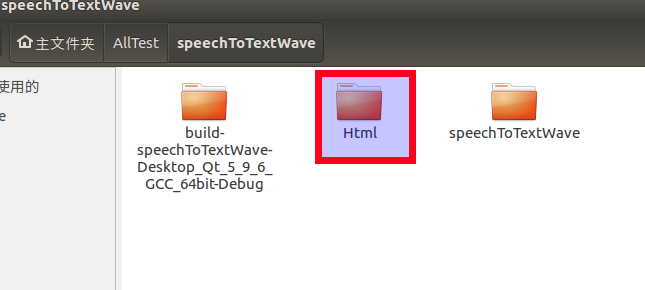
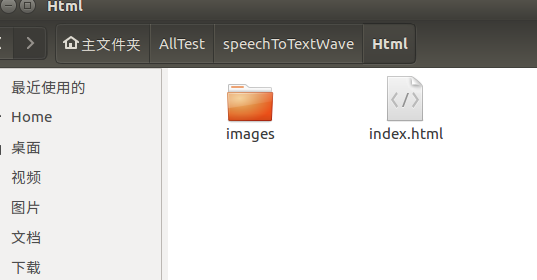
2、添加index.html文件,我放在项目同级目录”html“文件夹下:
我所编写index.html文件如下所示,你需要自己编写,我这里引用了图片。
index.html
1 2 3 4 5 6 7 8 9 10 11 12 13 14 15 16 17 18 19 20 21 22 23 24 25 26 27 28 29 30 31 32 33 34 35 36 37 38 39 40 41 42 43 44 45 46 47 48 49 50 51 52 53 54 55 56 57 58 59 60 61 62 63 64 65 66 67 68 69 70 71 72 73 74 75 76 77 78 79 80 81 82 83 84 85 86 87 <!DOCTYPE html> <html> <head> <meta charset="utf-8"/> <meta name="Generator" content="sublimeText"> <!--编辑器的名称--> <meta name="Author" content="PattenKuo"> <meta name="Keywords" content="Austin"> <meta name="Description" content="DialogWindow"> <title>Voice Assistant</title> <style> .content { height: document.body.clientHeight; width: document.body.clientWidth; background-repeat: no-repeat; background-image: url(./images/cover.png); } .ButtonArea{ display: flex; justify-content: center; /* 水平居中 */ align-items: center; /* 垂直居中 */ flex-direction: column; } .recordButton{ height: 350px; width: 350px; margin-top: 100px; animation:play 1s infinite alternate; animation-play-state: paused | running; } .UserWords{ margin-top: 120px; font-weight: bold; font-size: 40px; color: white; } /*注意要在动画的时候,可能会导致覆盖,这个时候也是需要去将其进行旋转处理的*/ @-webkit-keyframes play { 25%{transform: scale(1.2) } 50%{transform: scale(1.3) } 75%{transform: scale(1.2) } } </style> <script type="text/javascript"> window.onload=function(){ //let animation paused let UserWords = document.querySelector('.UserWords'); let elem = document.querySelector('.recordButton'); let state = elem.style['animationPlayState']; elem.style['animationPlayState'] = 'paused'; UserWords.innerText = 'Start'; } function StartRecord(){ //to fetch the words from users //window.open("https://www.baidu.com"); let UserWords = document.querySelector('.UserWords'); let elem = document.querySelector('.recordButton'); let state = elem.style['animationPlayState']; if(state === 'paused') { elem.style['animationPlayState'] = 'running'; UserWords.innerText = 'stop'; } else { elem.style['animationPlayState'] = 'paused'; UserWords.innerText = 'Start'; } } </script> </head> <body class="content"> <div class="ButtonArea"> <div class="recordButton" id="recordButton" onclick="StartRecord()"> <img src="./images/recordButton.png" > </div> <div class="UserWords"> <text > Start </text> </div> </div> </body> </html>
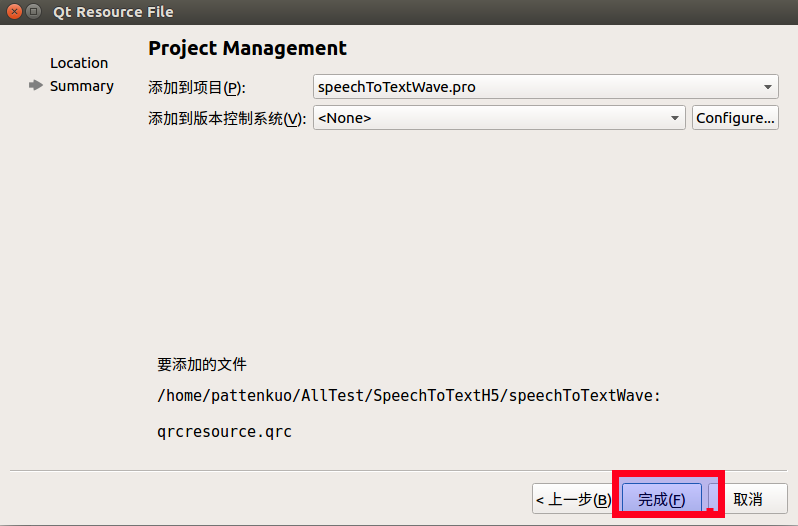
3、创建qrc资源路径:
填写文件名 -> “下一步” -> “完成” 即可
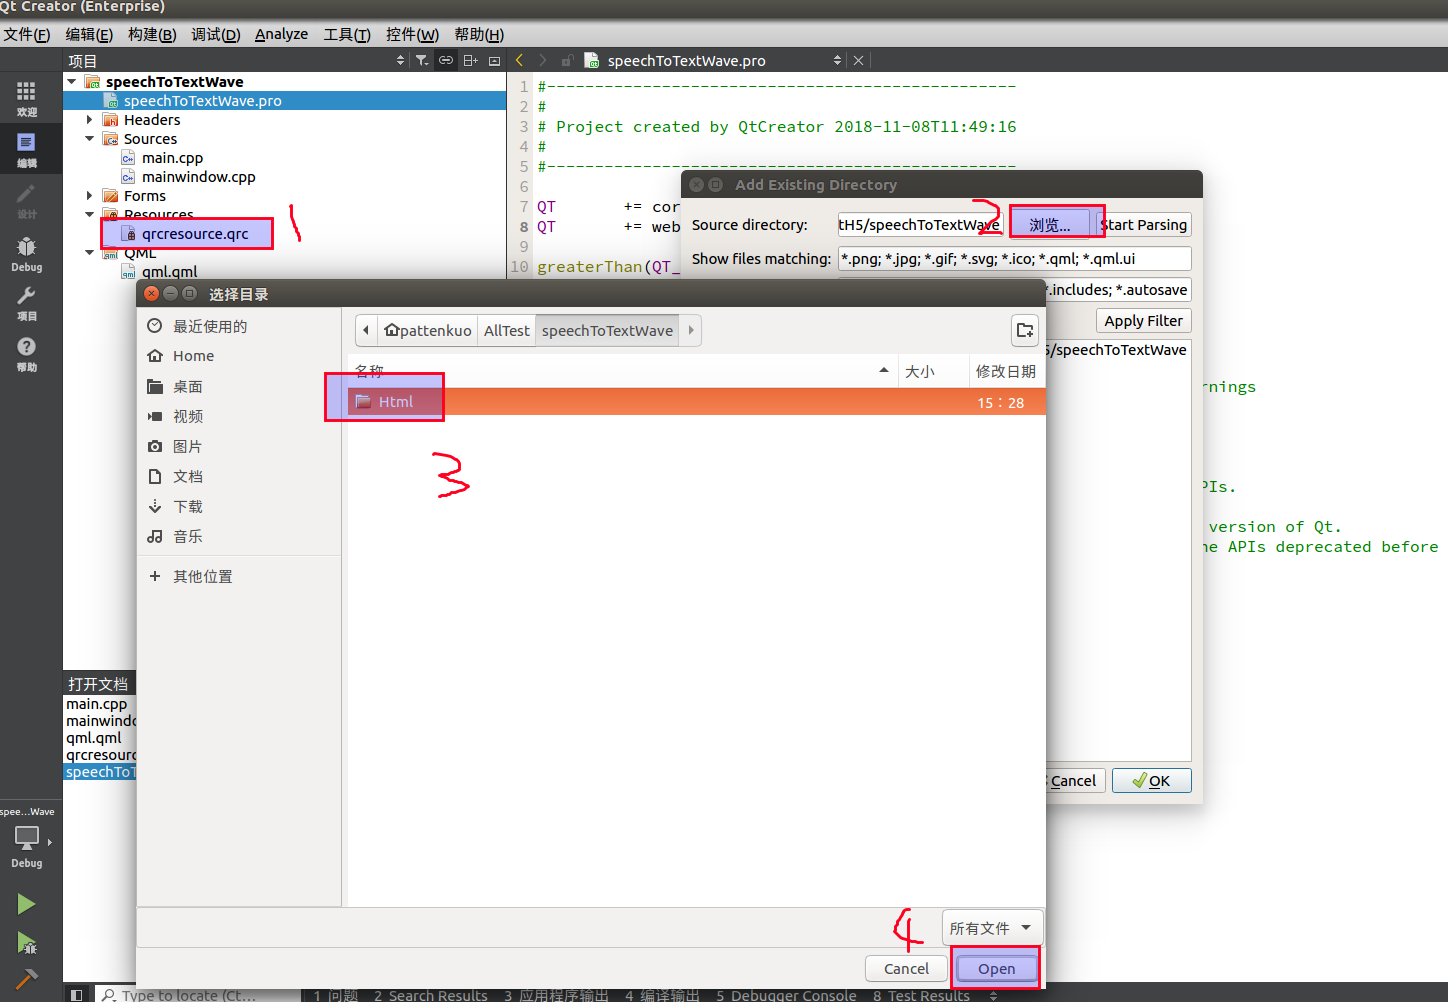
4、添加html路径到qrcresource.qrc:
单击"Start Parsing" -> 选择当前文件夹 -> “OK”
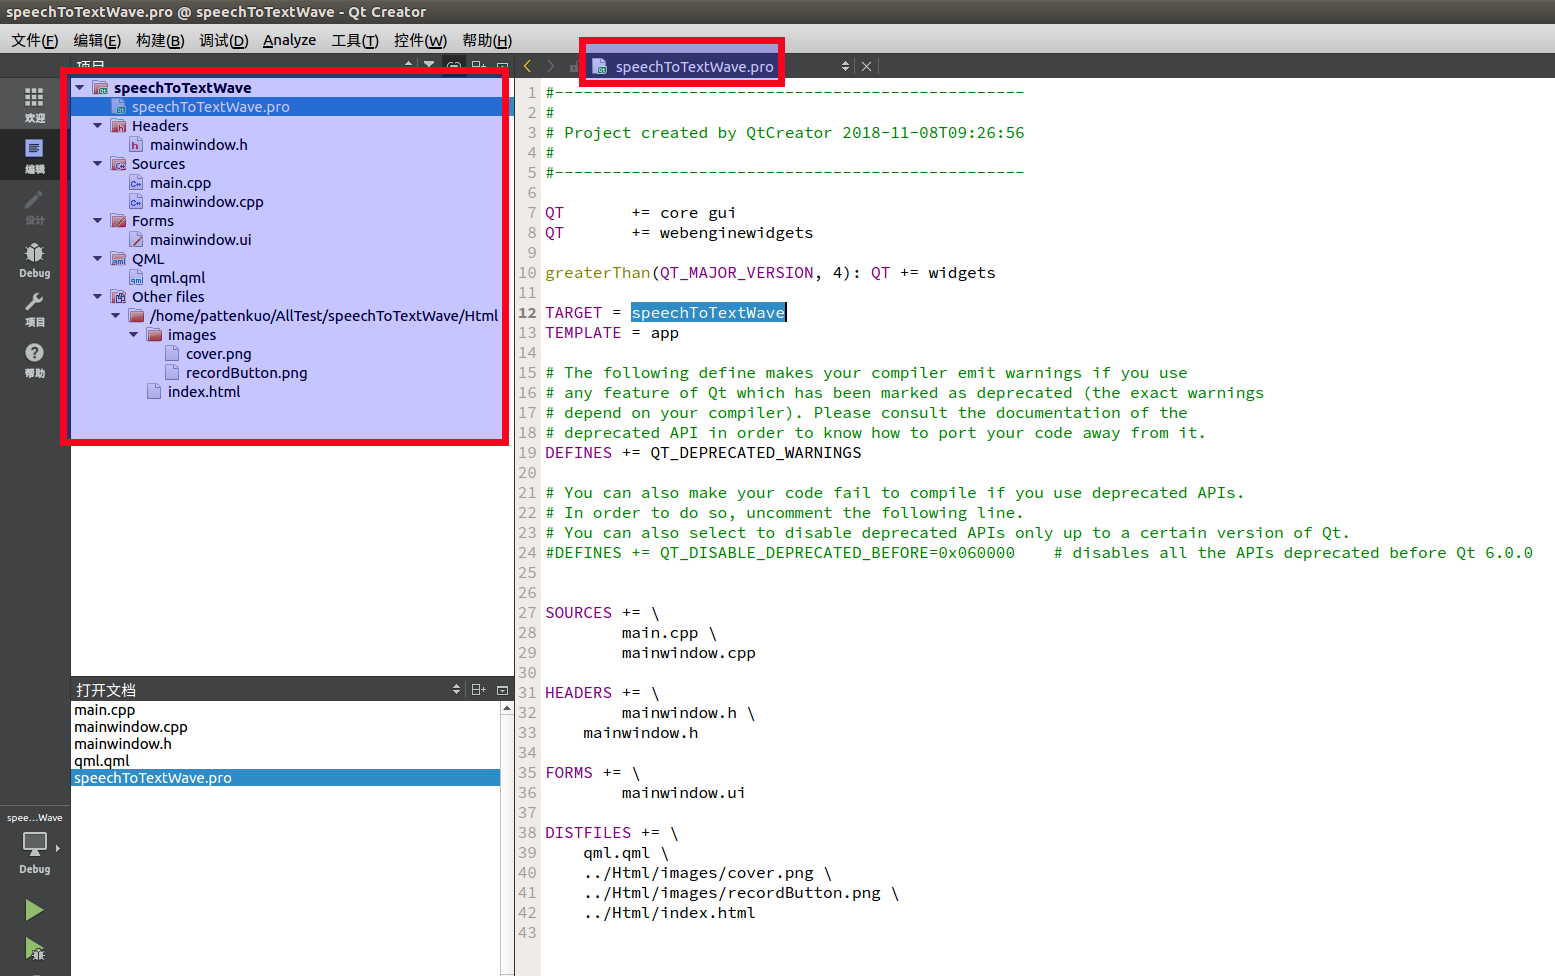
4、如图所示,项目文件目录和"speechToTextWave.pro "变化为:
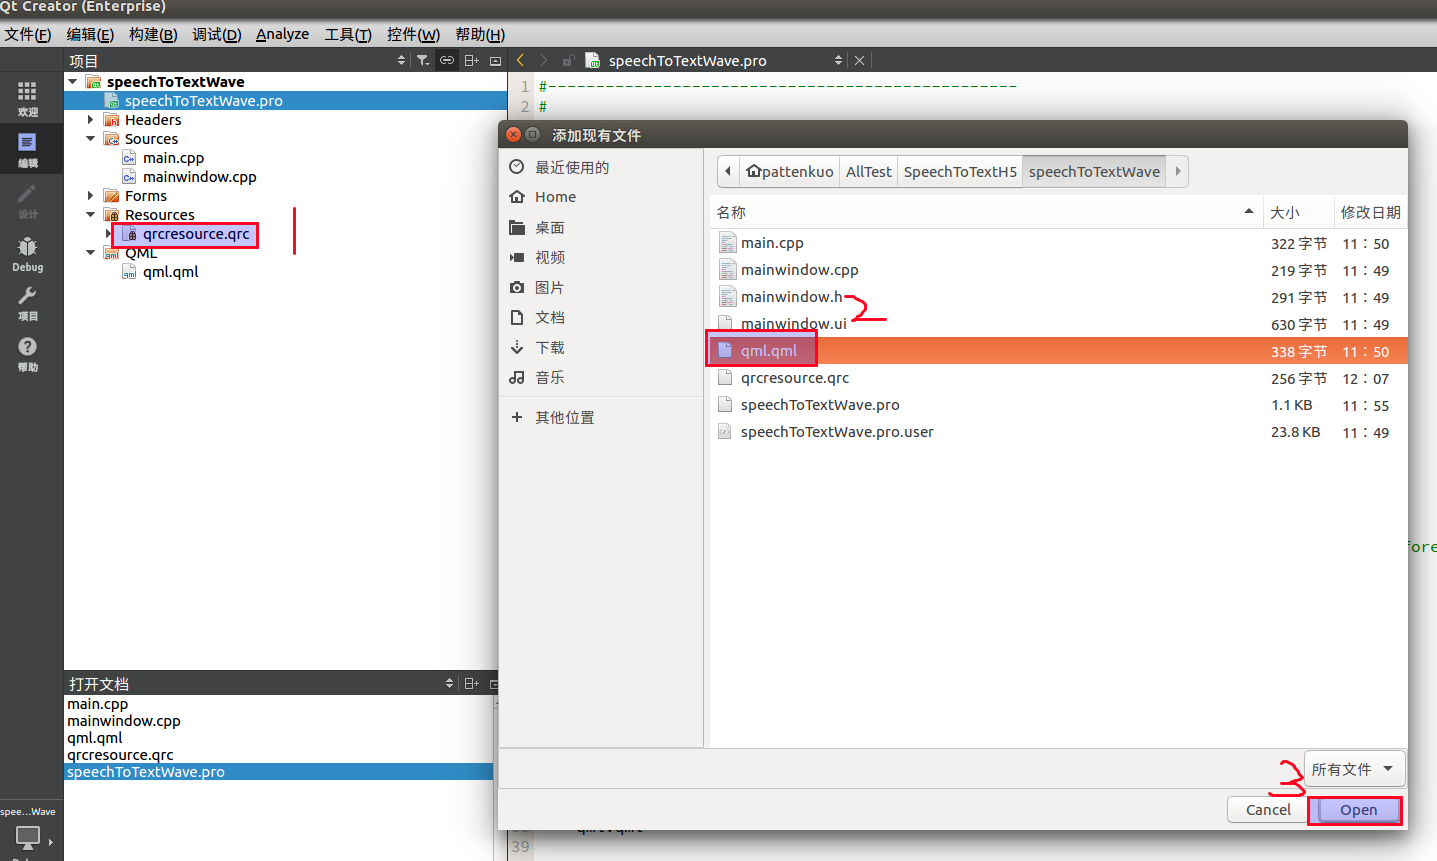
5、添加刚刚新建的qml.qml文件到qrcresource.qrc:
main.cpp
1
2
3
4
5
6
7
8
9
10
11
12
13
14
15
16
17
18
#include "mainwindow.h" #include <QApplication> #include<QtWebEngineWidgets> #include<QWebEngineView> int main(int argc, char *argv[]) { QApplication a(argc, argv); // MainWindow w; // w.show(); QQmlApplicationEngine engine; engine.load(QUrl(QStringLiteral("qrc:/qml.qml"))); return a.exec(); }
qml.qml
1
2
3
4
5
6
7
8
9
10
11
12
13
14
15
16
17
18
19
import QtQuick 2.0 import QtQuick.Controls 2.2 import QtQuick.Window 2.3 import QtWebEngine 1.1 ApplicationWindow { width: 800 height: 800 visible: true x:100 y:100 flags: Qt.WindowFullScreen | Qt.FramelessWindowHint WebEngineView { url: "qrc:/../../speechToTextWave/Html/index.html" anchors.fill: parent } }
若出现file:///home/pattenkuo/AllTest/speechToTextWave/build-speechToTextWave-Desktop_Qt_5_9_6_GCC_64bit-Debug/qml.qml:-1 No such file or directory
与编译调试目录有关
只需把qml.qml文件cpoy到指定的文件夹目录,比如我需要放置在目录”build-speechToTextWave-Desktop_Qt_5_9_6_GCC_64bit-Debug“下即可
致谢原文:QT中 No such file or directory 问题解决
.pro文件中各变量意义:
HEADERS 指定工程的 C头文件(.h)。 实现文件(.cpp)。预处理符号。 编译器搜索全局头文件的路径。